
Currently Empty: $0.00

A collapsed adult at a gym, a child pulled unresponsive from a pool, and an infant who suddenly stops breathing require the same first priority: recognize the emergency, call for help, and begin effective care. Yet the phrase adult child infant cpr covers important differences in body size, likely causes of arrest, hand placement, compression depth, and the way rescuers provide breaths. Knowing those differences helps you act with greater confidence when seconds matter.
CPR is not a substitute for emergency medical care. Call 911, send someone to get an AED if one is available, and begin care while help is on the way. A recognized, hands-on CPR course is the best way to turn these steps into skills you can perform under pressure.
Start With the Same Emergency Check
Before approaching, make sure the area is safe for you and the person in need. Check for responsiveness by speaking loudly and tapping the person. For an infant, tap the bottom of the foot rather than shaking or tapping the chest.
If the person is unresponsive and is not breathing normally, or is only gasping, treat it as a cardiac arrest. Activate 911 immediately. If another person is nearby, assign clear tasks: one person calls 911 and returns with an AED while the other starts CPR. When you are alone with an adult, call 911 and get an AED before beginning CPR if it is immediately available.
With a child or infant, the situation can be more nuanced. Pediatric emergencies are often caused by breathing problems, drowning, choking, severe illness, or trauma that leads to cardiac arrest. If you are alone and have no phone available, provide about two minutes of CPR before leaving briefly to call 911 and get help. If you witnessed a sudden collapse, call 911 and get an AED first, as you would for an adult.
Adult Child Infant CPR: The Critical Differences
High-quality CPR means pushing hard enough, pushing fast enough, allowing the chest to fully recoil, and minimizing interruptions. For all ages, aim for a rate of 100 to 120 compressions per minute. The technique changes because a child’s or infant’s chest is smaller and more flexible.
Adult CPR technique
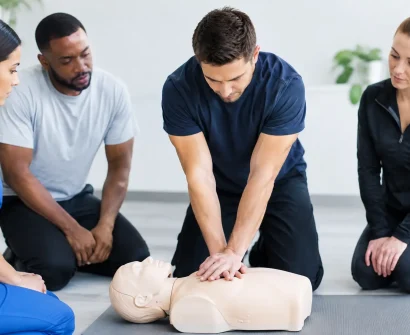
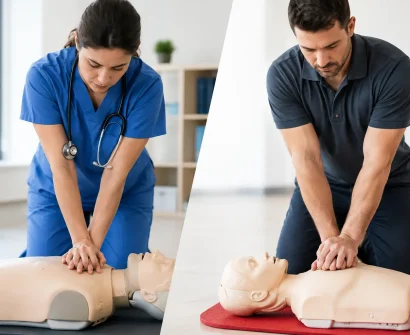
Place the heel of one hand in the center of the chest, on the lower half of the breastbone. Put your other hand on top, interlace your fingers if comfortable, keep your arms straight, and position your shoulders directly over your hands. Compress at least 2 inches deep, allowing the chest to return fully to its normal position after every compression.
For a single rescuer, give 30 compressions followed by 2 breaths. Each breath should last about one second and create visible chest rise. If the chest does not rise, reposition the head, ensure a good seal, and try again. Do not spend long periods trying to deliver breaths at the expense of compressions.
Child CPR technique
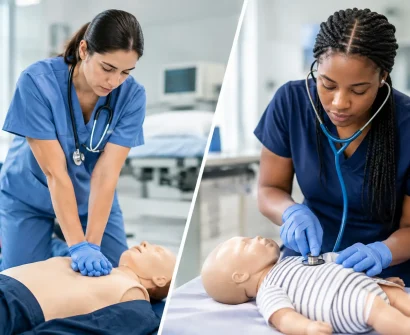
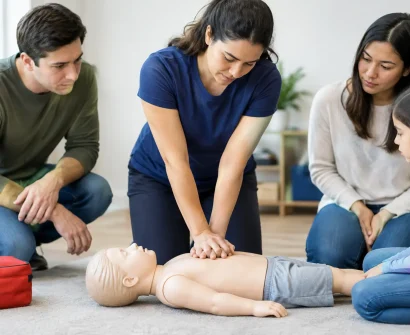
A child is generally defined as someone from age one to puberty. Use one or two hands in the center of the chest, depending on the child’s size and your ability to achieve proper depth. Compress at least one-third the depth of the chest, or about 2 inches. A smaller child may require only one hand; a larger child may require two.
A lone rescuer uses a 30:2 compression-to-breath ratio. When two trained rescuers are present, they use 15 compressions and 2 breaths for children. This allows more frequent breaths, which can be particularly valuable when the emergency began with a breathing problem.
Infant CPR technique
For an infant younger than one year, use two fingers in the center of the chest just below the nipple line when you are the only rescuer. Compress at least one-third the depth of the chest, about 1.5 inches. Your fingers should press straight down, with enough force to create effective compressions without pressing on the ribs or upper abdomen.
When two trained rescuers are available, the preferred technique is the two-thumb encircling hands method. Place both thumbs side by side on the center of the chest and wrap your hands around the infant’s chest to support the back. This method can produce more consistent compression depth and better blood flow. Two trained rescuers use a 15:2 ratio.
Infant breaths require a gentle touch. Cover both the infant’s mouth and nose with your mouth and give just enough air to make the chest rise. Large, forceful breaths can be harmful and are not more effective.
Why Breaths Matter More in Pediatric Emergencies
Hands-only CPR is a practical option for an untrained bystander responding to a suddenly collapsed teen or adult. Continuous chest compressions are far better than doing nothing.
For infants and children, however, CPR with breaths is especially valuable because many pediatric arrests begin after oxygen levels have fallen. Drowning, choking, respiratory illness, and airway obstruction can all lead to a lack of oxygen before the heart stops. If you are trained and able, provide both compressions and breaths for a child or infant.
That said, hesitation can cost valuable time. If you cannot give breaths or are unwilling to do so, begin chest compressions and follow the 911 dispatcher’s instructions. Emergency dispatchers can guide rescuers through the next steps until professional help arrives.
Using an AED on Adults, Children, and Infants
An automated external defibrillator analyzes the heart rhythm and tells you whether a shock is advised. Turn it on as soon as it arrives and follow the voice prompts. AEDs are designed to guide lay rescuers, and using one quickly can make a life-changing difference in certain cardiac arrests.
For adults, apply the adult pads as shown in the AED diagram. For children, use pediatric pads or a pediatric setting when available, typically for those under age eight. If pediatric pads are not available, use standard adult pads rather than waiting. Make sure the pads do not touch each other. If needed, place one pad on the chest and the other on the back.
An AED may also be used for an infant when appropriate equipment and protocols are available. Pediatric pads or an attenuator are preferred. If they are not available in a life-threatening emergency, an adult AED can still be considered rather than delaying defibrillation. Continue CPR until the AED is ready to analyze, make sure no one is touching the person during analysis, and resume compressions immediately after a shock or a no-shock instruction.
Avoid the Mistakes That Reduce CPR Quality
Even well-intentioned rescuers can lose effectiveness by stopping too often. Avoid extended pauses to check for a response, deliver breaths, adjust your position, or wait for the AED. Once CPR starts, keep interruptions as short as possible.
Other common problems include compressions that are too shallow, leaning on the chest between compressions, and breathing too forcefully. Full chest recoil lets the heart refill with blood. A steady rhythm, correct depth, and rapid return to compressions matter more than performing every step perfectly.
It also helps to recognize that choking care and CPR are not the same. If a responsive person is choking and cannot speak, cough, or breathe, provide choking first aid. If they become unresponsive, lower them carefully to the ground, call 911, begin CPR, and look in the mouth for a visible object before attempting breaths. Never perform a blind finger sweep.
Hands-On Practice Builds Real Readiness
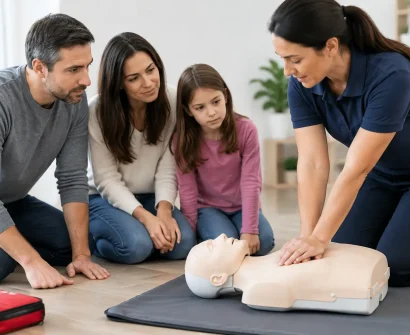
Reading CPR steps is a useful starting point, but a real emergency is physically and emotionally demanding. Most people do not know what 2 inches of compression depth feels like until they practice on a manikin. They may also need coaching on hand placement, ventilation technique, AED pad placement, and working with another rescuer.
Course selection depends on your role. Parents, caregivers, teachers, coaches, and workplace responders often benefit from a CPR AED and first aid course that includes adult, child, and infant skills. Healthcare professionals may require Basic Life Support or a pediatric-focused credential based on employer, licensing, or clinical requirements. Renewal training is equally valuable because CPR guidelines, equipment, and confidence can change over time.
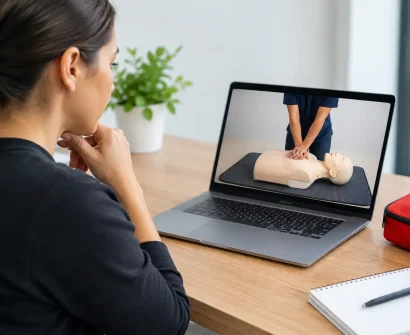
At Save a Life First Aid & CPR Training, hands-on instruction gives participants a structured setting to ask questions, practice realistic scenarios, and receive feedback that a video alone cannot provide. The goal is not to create fear. It is to make your first actions clearer when someone needs help.
The most helpful thing to remember is simple: call 911, start effective CPR, use an AED as soon as it is available, and keep going until emergency professionals take over or the person shows clear signs of life. Preparing before an emergency gives you the best chance to protect a life when it matters most.